
By Chris Evans
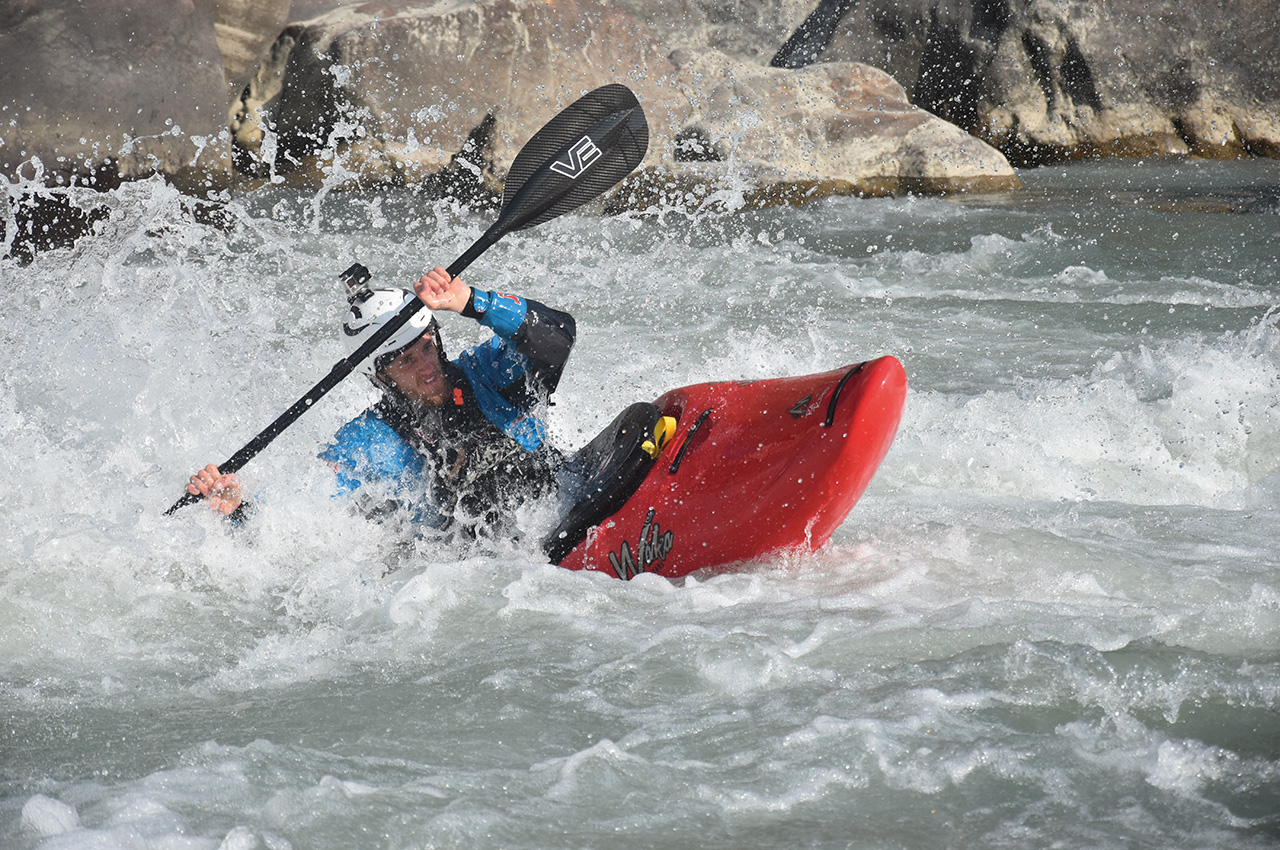
Photos: Plas Y Brenin
The key to visualisation is to disengage the brain and go
- Visualisation is the ability to ‘imagine’ situations and how they could or should be managed when faced with them in real life.
- To see positive actions and believe in the reality of the vision.
- Techniques used to create images, diagrams or animations to communicate a message.
If you type visualisation in coaching into a google search, the above are a few of the definitions that appear. All of these can be applied in a paddle-sport coaching setting, and I’ll give some top tips towards its application. However, this article will look at unlocking or adding to your visualisation tools to help you see a line on a river, certain moves in an environment or new possibilities in comfortable terrain/the environment. If visualisation is something you want to incorporate into your paddling, then play with the suggested points below, keep the ones that work for you and disregard the rest.
The worst-case scenario
Stay with me here; this sounds fairly backwards but being able to visualise the likely worst-case scenario allows you to predict where the water might push you if things don’t go plan, set up appropriate rescues, make inaction decisions (is it for you or not) and react when your positive plan doesn’t work (pushed offline for example). The critical bit to note here is the wording ‘likely’ worst case, the constant visualisation of trees falling on you or cars ending up in the river (both real replies to the question what are the hazards) is indeed the worst case; however, very unlikely. If I were to get my line wrong or misjudge a movie, what’s the outcome, where do I end up or what’s the likelihood of injury are all good questions to help visualise the worst-case scenario.
The big question is, when is it appropriate to visualise the potential negative? One answer is to do this first to help speed up decisions and put necessary actions in place. Try not to let this become the focus of your visualisation, as the worst-case visualisation can become a pattern of poor visualisation.
Poor visualisation
How’s this different to visualising the worst-case scenario, I hear you ask! Poor visualisation is often the pattern of preservation, the primal fight or flight. Visualisation becomes poor when it hinders; if the visualisation of worst-case has you always paddling the same rivers/stretches of water to be in a comfort zone or not safely pushing yourself, ask yourself why. I’ve often found myself running through a particular rapid in my head, and pictured capsizes or pins/swims and had to force myself to think about something else. I have experienced these patterns at home before even venturing to the river.
What I will say is we can all experience this. In the wild, this pattern keeps us alive. As a top tip here, if you are finding yourself visualising all sorts of horrific scenarios or outcomes, often described as I’ve just got this ‘stuck in my head’, let it play out and then rationalise it. My example above was rationalised by telling myself a couple of things firstly; you’ve not even got on the river yet, and secondly, how many times has it gone wrong compared to successfully? If you were to dream the nightmare nasty swim or entrapments, the likelihood is you’d wake up and dismiss it (not always and not everyone); why not do the same with the poor visualisation pattern? Call it a daydream, and it’s not a reality until it’s real.
Picture perfect
When you’re able to picture how the environment is moving and the perfectly placed required movements to be smooth and purposeful (where to put your boat and how you’re going to place your paddle strokes). So long as it’s realistic for your skill level and the flow of the day (does the movement of your craft feel effortless or hard work), then purposeful visualisation can happen. Below are a few methods I’ve used with people to help gain the individualised picture of performance.
The camera lens
We’ve all heard the expression ‘can’t see the wood for the trees’; sometimes, the paddling environment can present us with the same thing. The river can often be so cluttered that your focus changes from the line you’re after to other elements like hazards, safety crew/onlookers or other paddlers on the river. Depending on your arousal level, you might be able to take this information in; if you’re right at the top of your comfort zone. Chances are the extra info might make things feel cluttered, overwhelming or give the feeling of happening quicker than you can compute.
An approach to help with this is to imagine that you’re looking at the rapid/environment through a camera lens, particularly one with a good zoom and taking still shots. Start zoomed out; what can you see when you look big picture? The likelihood is you’re picking up a lot of the elements described above. Once this has been processed, deliberately change your focus by imagining your’ zooming in’ on the lens to focus solely on the line you wish to paddle/where you want to place your boat. Once you’ve got this focus, keep it, keep it through the distractions. Don’t let the screams from your paddling mates, the empty boat happily spinning in that nasty eddy or the stuck tree get into the deliberate blinker.
To help picture the line, I’ll imagine that the camera’s taken a still shot of both zoomed in and zoomed out. The still shot allows me to slow things down and consider my next steps; If my next steps are to paddle the rapid, I’ll imagine the camera’s taking a video rather than a still. Either of these approaches can be done from the bank or your kayak; if you’re in your kayak, try to ensure it’s not time-pressured. Middle of a rapid might not give the time needed to visualise, whereas, sat in most eddies, you can visualise for as long as you need.
If you’ve managed to intentionally and productively change your focus with the method above, can you see any markers that help you remain on line (something to aim for) or mark a key move on the river. It could be as simple as the feature that creates the eddy you’re after. Something as simple as highlighting a tree branch a foot off of your line changes your intent in the water, moving you from passenger (floating with the flow) to purposeful (I’m driving toward the fixed feature). You often see groups doing this by having someone on the bank hovering the blade above the line for you to aim for. This approach works; however, your understanding of the environment increases if you do the same with river features.
Visualising the key placements
When talking about key placements, it’s often the blade that gets the focus, hook your blade on the edge of this drop here, put your paddle into the eddy and so on. You can be pivotal with the placement of your boat and body; getting these all aligned is the real aim. I’m not going to go into the technical details of how to edge reliably or engage positive drive simultaneously; instead, this is about visualising these key placements of boat, body or blade.
Arguably picturing the perfect placement is easy; picturing yourself achieving it could be a different story. Why not think of this as a freeze-frame. How should it look if the movement is frozen in time for a split second? If you’re going to do this, try to keep it simple; if you can have one or two things to picture in action, it becomes easier to keep the focus.


The onlooker versus the real-time view
What I’m talking about here is the different perspectives; what should it look like if you were to watch the perfect performance from the bank, and how should it look from the paddler’s view. Visualising the perfect descent down a rapid from an onlooker’s perspective might give the picture of the required paddle-strokes, boat movements or movement of the water. Try to think of this as a real-time rehearsal of the performance. What edge, paddle-strokes and movements are required, and what’s the likely speed (e.g. if it’s perfect, how quickly will you move through the rapid).
The onlooker’s view can make it hard to picture the timing and, therefore, imagine how it might feel to nail that drop or carve into that eddy. If you can picture it from the paddler’s view, you have the potential to visualise not only the required moves but also the intricacies needed to make that move work in action. For example, the onlooker might not have their view obscured by a wave or stopper, whereas the paddler might. The onlooker might just see water flowing around a rock as it turns the bend; the paddler might see the rise in the cushion wave as it interacts with the rock – same rapid different view. The paddler’s view is the view you’ll get in action; therefore, being able to picture this allows the closest thing to real-life; the closer you can get with your vision, the closer you’ll be with your interpretation of how it might feel.
The water interacting with that rock, as you edge then accelerate around it, are you going to feel a thump from the rock then the impact of the landing or is the cushion wave sufficient enough that the move will feel soft. Will you feel like you’re accelerating or decelerating through the move you’ve chosen? Fortunately, the action cameras readily available now have made this first-person view much easier to picture. If you recorded it from a headcam, how would it look?
Slow-motion
Ever got to the bottom of a rapid and felt out of control to the point that it felt like the environment was one step ahead. The chances are that at the top of your comfort zone, if you just ‘disengage brain and go’ that the amount going on in the big picture and real-time is too much to take in, potentially leaving you one step behind each move.
To help with this, if the above is working, why not imagine that you’re putting the above-imagined videos into slow motion. If it’s with less of a time pressure, where are the key movements? Where would you focus? What markers have you picked up? Try running through the dry rehearsal in slow-mo, then bringing it back to real-time; this makes it as close to the experience as possible before action.
The dry rehearsal
Rehearsing the required movements to get down a rapid or make attainments allows a heightened link with the mental picture and the feel of the movement. By dry rehearsal, I mean a run-through of where you’re going to put you, your boat and your paddle through the movement. This is often done without realising; try describing a rapid without hand gestures, the hand gestures that mimic what the edges might do through a confusing stretch of water or pulling on the blade on the lip of a drop occur regularly. Sometimes these gestures happen without realising.
To help with the dry rehearsal, as you picture the movements using the above visualisation suggestions, over-exaggerate the movements your naturally starting to feel yourself doing. This could be as simple as moving your hips through your predicted carving movements or as simple as a physical reminder to sit up when it gets pushy.
Coaching visualisation, top tips
Helping someone with their visualisation can be quite tricky as the subject is quite broad arguably; someone’s future goals are a vision of where they aspire to be so that visualisation can happen naturally.
One of the best tips I can give is to keep a positive dialogue going; without interaction, there’s a bit more chance of the performer reverting to a poor cycle of visualisation. By keeping the dialogue going, what I mean here is to allow the poor cycle to happen and introduce questions to challenge it. Questions like ‘how does that compare to today’s performance’ start to link the mental picture to action.
Get a video or two of the paddler’s performance. This allows the paddler to see if their interpretation of performance matches the action; if there’s a mismatch (interpretation of themselves is above or below their standard), then the visualisation tools above can be out of sync.
